Everyone knows marketing assets need to be good. They need to look professional, communicate clearly, and drive results. You probably assume your team is already doing a decent job of checking things before they go live.
None of that is wrong. But it’s incomplete.
The hard truth? A haphazard approach to marketing asset Quality Assurance (QA) is a ticking time bomb for your brand reputation and your bottom line. In today's fast-paced digital landscape, errors that slip through the net aren't just embarrassing; they can be costly.
This isn't about finger-pointing. It's about building a systematic process that catches mistakes before they ever reach your audience. Let's break down how to construct a marketing asset QA workflow that actually works.
1. Define 'Done' for Every Asset Type
Before you can test anything, you need to know what 'good' looks like. This sounds obvious, but it’s where most processes break down. Vague standards lead to inconsistent checks.
Start by categorizing your marketing assets. What do you produce regularly?
- Social media graphics
- Website banners
- Email newsletters
- Blog post images
- Case studies
- Video thumbnails
- Ad creatives (display, social)
- Landing pages
- Infographics
For each category, create a specific checklist. This isn't just about spelling. It's about brand consistency, technical specs, and strategic goals.
Brand Consistency Checklist
This is non-negotiable. Every asset must align with your established brand guidelines.
- Logos are correct (size, placement, version).
- Brand colors are used accurately (hex codes, tints, shades).
- Typography is on-brand (fonts, weights, sizes, hierarchy).
- Imagery style is consistent with brand aesthetic.
- Tone of voice is appropriate for the brand and platform.
Technical Specifications Checklist
Different platforms have different rules. Ignoring them leads to broken experiences.
- File formats are correct (JPG, PNG, GIF, SVG, MP4, etc.).
- File sizes are optimized for web/platform (under 1MB for images, specific video bitrates).
- Dimensions and aspect ratios meet platform requirements (e.g., Instagram Story vs. feed post).
- Resolution is appropriate (e.g., 72 DPI for web, 300 DPI for print).
- Links are correctly implemented and functional.
- Mobile responsiveness is tested (for web assets like banners and landing pages).
- Accessibility standards are considered (e.g., sufficient color contrast, alt text for images). You can learn more about accessibility at the Web Content Accessibility Guidelines (WCAG).
Content & Accuracy Checklist
This is where errors can hit your credibility and ROI the hardest.
- All copy is proofread for grammar, spelling, and punctuation.
- Facts, figures, and statistics are verified.
- Calls to action (CTAs) are clear, compelling, and correct.
- Offer details (discounts, dates, terms) are accurate.
- Contact information (phone numbers, emails, URLs) is correct.
- Legal disclaimers or fine print are included and accurate.
- Product names and features are spelled correctly.
These checklists should be living documents. Update them as platforms change or your brand evolves.
2. Map Your Workflow: Who Does What, When?
A QA process is only as good as its integration into your workflow. It can't be an afterthought.
Identify every stage where an asset is created, reviewed, and approved. Then, pinpoint where QA checks should occur.
The Creation Phase
Initial quality starts with the creator. They should perform a self-check against the relevant checklist before submitting for review.
This isn't about burdening designers or copywriters. It's about empowering them to catch their own mistakes early. It’s faster and cheaper.
The Review Phase
This is where formal QA typically happens. Assign specific individuals or roles to conduct checks.
- Peer Review: Another team member checks the asset. Good for catching typos or minor visual glitches.
- Manager/Director Review: A creative lead or marketing manager checks for strategic alignment, brand adherence, and overall effectiveness.
- Subject Matter Expert (SME) Review: For technical or highly specific content, an SME should verify accuracy.
- Legal/Compliance Review: Essential for regulated industries or when specific claims are made.
Crucially, define the scope of each review. Is it a full checklist review, or are they focused on specific areas?
The Approval Phase
This is the final gate. The approver signs off, confirming the asset meets all defined standards. This person takes final responsibility.
Post-Launch Monitoring
QA doesn't stop when an asset goes live. Monitor performance and user feedback. Are there unexpected issues? Did something break in the wild?
This feedback loop is vital for refining your checklists and workflow.
3. Implement a Tiered Review System
Not every asset needs the same level of scrutiny. A daily social post is different from a major campaign landing page.
Implement a tiered system based on asset complexity, risk, and impact.
- Tier 1 (High Impact): Major campaigns, website redesigns, product launches. Requires multiple review layers, including SME and legal.
- Tier 2 (Medium Impact): Regular email newsletters, blog posts, ongoing ad campaigns. Requires manager and potentially peer review.
- Tier 3 (Low Impact): Simple social media graphics, minor website updates. May only require creator self-check and a quick manager sign-off.
This tiered approach ensures resources are allocated effectively. You're not wasting senior time on minor tasks, but high-stakes items get the attention they deserve.
4. Centralize Feedback and Revisions
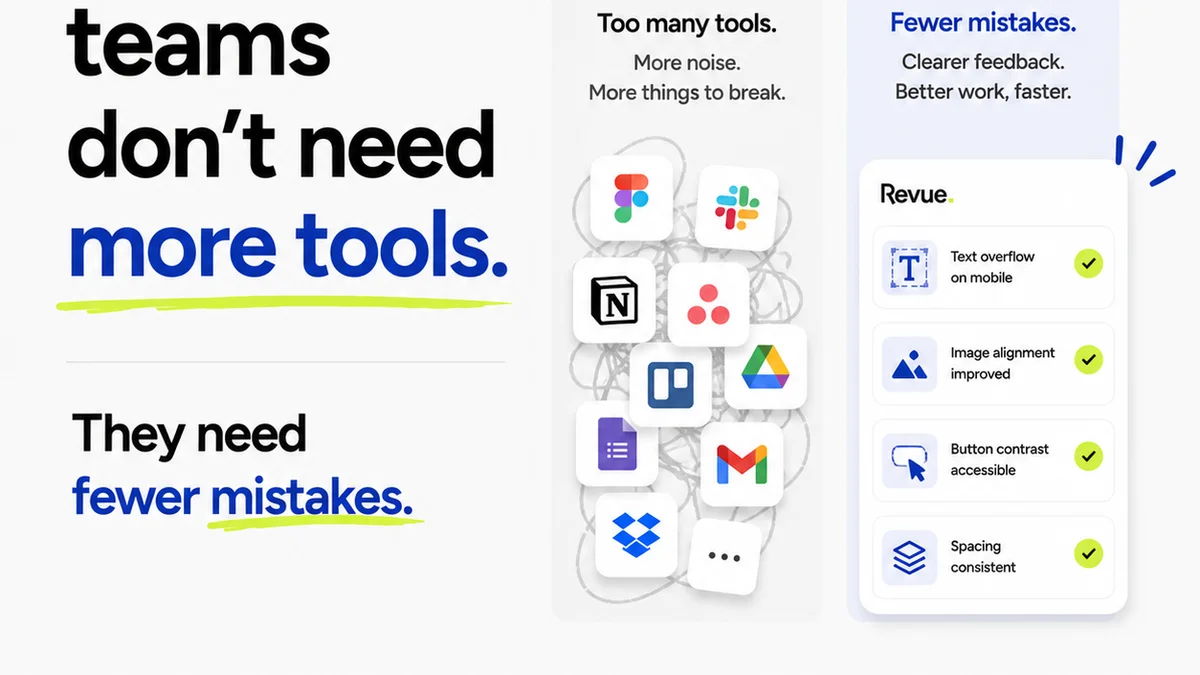
Scattered feedback is a recipe for missed comments and endless email chains. Imagine getting feedback from three different stakeholders via email, Slack, and a shared doc.
This is where a dedicated platform becomes essential.
Centralizing feedback means all comments, annotations, and revision requests live in one place, directly on the asset itself. This provides:
- Clarity: Everyone sees the same feedback.
- Context: Comments are tied to specific visual elements.
- Accountability: It’s clear who provided what feedback and who is responsible for actioning it.
- History: A record of all feedback and revisions is maintained.
This dramatically reduces the chance of crucial comments being overlooked and ensures everyone is working from the latest version.
5. Automate Where Possible
Manual checking is prone to human error and is time-consuming. Look for opportunities to automate repetitive checks.
- Spell Checkers & Grammar Tools: Integrate tools like Grammarly into your writing process.
- Link Checkers: Use browser extensions or online tools to verify URLs.
- Image Optimization Tools: Many tools automatically compress images while maintaining quality.
- Automated Accessibility Scanners: Tools can flag basic contrast or alt text issues.
- Code Linters: For web development, linters enforce coding standards and catch errors.
Automation handles the mundane, freeing up your team for more critical, subjective reviews.
6. Foster a Culture of Quality
Ultimately, a strong QA process relies on people. You need a team that understands and values quality.
This means:
- Training: Ensure everyone understands the brand guidelines, technical specs, and the QA process itself.
- Clear Roles & Responsibilities: No ambiguity about who is responsible for what check.
- Psychological Safety: Team members should feel comfortable pointing out errors without fear of reprisal. Quality checks are a team effort, not a personal attack.
- Continuous Improvement: Regularly review the QA process itself. What's working? What's not? Solicit feedback from the team.
A commitment to quality should permeate the entire creative department.
Where Revue Fits In
Building and maintaining a robust marketing asset QA process can feel like juggling. Feedback comes from everywhere, versions get confusing, and tracking approvals is a nightmare. That’s precisely why tools like Revue exist.
Revue provides a centralized hub for client feedback and internal reviews. Imagine:
- All feedback in one place: No more digging through emails or Slack. Comments are attached directly to the asset.
- Clear revision history: Track every change, who made it, and when. See exactly how an asset evolved.
- Streamlined approvals: Formal sign-offs ensure nothing goes live without the necessary checks.
- Version control: Always work from the latest approved version.
By centralizing these critical steps, Revue helps ensure your marketing assets meet quality standards consistently, reducing errors and speeding up your time to market.
Final Thought
Is your current marketing asset QA process a well-oiled machine, or a series of desperate last-minute fixes?
Investing in a structured, systematic approach isn't just about avoiding mistakes. It’s about building trust with your audience, protecting your brand, and maximizing the return on your creative investments. What's one small change you can make today to strengthen your QA?
Frequently asked questions
What are the key components of a marketing asset QA process?
A robust QA process includes defining 'done' for each asset type with specific brand, technical, and content checklists; mapping a clear workflow with defined roles and responsibilities; implementing a tiered review system based on asset impact; centralizing feedback and approvals; automating repetitive checks where possible; and fostering a team culture that prioritizes quality.
How can I ensure brand consistency across all marketing assets?
Establish clear brand guidelines covering logos, colors, typography, imagery, and tone of voice. Create specific brand consistency checklists for each asset type and ensure all team members are trained on these guidelines. Centralized feedback tools can help enforce these standards during the review process.
What is the role of automation in marketing asset QA?
Automation can handle repetitive, objective checks like spelling and grammar, link verification, image optimization, and basic accessibility scans. This frees up human reviewers to focus on more subjective and critical aspects of quality, such as strategic alignment and creative execution.
How does a centralized feedback tool like Revue help with QA?
Revue centralizes all feedback, annotations, and revision requests directly on the asset, eliminating confusion from scattered communication channels. It provides a clear history of changes and streamlines the approval process, ensuring that all necessary checks are completed before an asset goes live.