Everyone thinks packaging QA is about catching typos and misaligned logos. That’s part of it, sure. But it’s not the whole story. And if you’re only looking for those surface-level mistakes, you’re missing the bigger, more expensive problems.
The hard truth? Effective packaging quality assurance is less about spotting a rogue comma and more about building a system that prevents errors from happening in the first place. It’s about process, not just proofreading.
1. Beyond the Pixel Push: What Packaging QA Really Means
Most teams treat packaging QA as a final check. A quick once-over before sending the files to print. This is a critical mistake. By the time you're 'checking' the packaging, the design is locked, the die-lines are set, and the costs to change anything are sky-high.
True packaging QA starts much earlier. It’s integrated into the entire workflow, from initial concept to final print-ready files. It’s about a shared understanding of requirements, meticulous documentation, and layers of checks at each stage.
The Misconception: QA is a Final Step
This is where most agencies and in-house teams stumble. They see QA as a gatekeeper at the very end of the process. This means:
- Designers rush to finish, assuming QA will catch errors.
- Account managers don't fully brief designers on technical specs.
- Printers receive files that haven't been thoroughly vetted for production realities.
The Reality: QA is an Integrated Process
Think of it as quality *assurance*, not quality *control*. Assurance means building quality in from the start. Control is just checking for defects at the end.
A robust packaging QA process involves:
- Clear briefs with all technical specifications.
- Designers understanding production constraints.
- Internal reviews at multiple design and production milestones.
- Client reviews focused on both creative and functional aspects.
- Final technical checks of print-ready files.
2. Setting the Foundation: Briefing and Specifications
You can’t QA what you don’t clearly define. The foundation of any good packaging project is a comprehensive brief. This isn't just about the brand's look and feel; it's about the nuts and bolts of the package itself.
What needs to be in this brief? Everything.
Essential Briefing Components
- Product details: What is it? How is it used? Who is the target audience?
- Dimensions: Exact measurements for the package, including bleeds and trims.
- Material: What will it be printed on? (e.g., coated paperboard, corrugated cardboard, plastic film). This impacts color reproduction and finishing.
- Printing method: Offset, flexo, digital? Each has unique requirements.
- Finishing: Varnishes, coatings, foil stamping, embossing, spot UV? These add complexity and require specific file setups.
- Regulatory requirements: FDA, FCC, country-specific labeling laws.
- Logistics: How will it be shipped? Stored? Assembled?
- Structural requirements: Die-lines, folds, glue tabs, tamper-evident features.
This information isn't optional. It needs to be clearly communicated and agreed upon before design work begins.
The Die-Line: Your Blueprint
The structural die-line is paramount. It dictates the printable area, fold lines, and assembly points. It must be accurate. Any deviation here cascades into production nightmares.
Ensure the die-line is:
- Created by a structural designer or packaging engineer.
- Provided in a vector format (e.g., AI, EPS).
- Clearly labeled with dimensions, fold lines, and cut lines.
- Reviewed for feasibility by the printer.
3. Design and Pre-Production Checks
Once the brief is set and the die-line is ready, the design phase begins. This is where many QA opportunities exist before the final file is even generated.
Internal Design Reviews
Don't wait until the design is 'final' to have others look at it. Schedule internal reviews at key milestones:
- Concept review: Does the design meet the brief's objectives?
- Layout review: Is all copy placed correctly within the dieline? Are brand guidelines followed?
- Color review: Are colors specified correctly for the chosen print method (CMYK, PMS)?
- Technical review: Are bleeds sufficient? Are there any tiny traps or gaps that could cause printing issues? Are all required elements (logos, legal copy) present?
These reviews should involve not just the designer, but also a project manager, a senior creative, and ideally someone with print production knowledge.
Client Collaboration
Client reviews are crucial, but they need structure. They should be guided by the requirements established in the brief.
Focus client feedback on:
- Brand alignment: Does it feel right?
- Messaging clarity: Is the key information easy to understand?
- Accuracy: Have they reviewed all copy, especially legal and nutritional info?
- Functional aspects: Does the packaging seem like it will work as intended?
Avoid letting clients dictate technical print specs unless they are the experts. Guide them to confirm their understanding of what's been proposed.
4. The Final File Check: Print-Ready Perfection
This is the traditional 'QA' step, but it should be the least stressful if the previous stages were done correctly. This is a meticulous, systematic check of the final artwork files before they go to the printer.
What to Check in Final Files
Create a comprehensive checklist. This is non-negotiable.
- File Format: Correct file type (e.g., PDF/X-1a, AI).
- Dimensions: Does the artboard match the die-line? Are bleeds and trims correct?
- Color Modes: All colors are CMYK or specified PMS. No RGB or indexed color.
- Overprint Settings: Are black areas set to overprint correctly? Are there unintended overprints?
- Fonts: All fonts are outlined or embedded. No missing font warnings.
- Image Resolution: All images are at the correct resolution (typically 300 dpi at final print size).
- Vector vs. Raster: Logos and line art are vectors. Photos are raster.
- Die-line Accuracy: Is the die-line layer present and correctly set up for the printer?
- Cut and Fold Lines: Are these clearly defined and separate from artwork?
- Spot Colors: Are PMS colors named correctly and consistently?
- Content Accuracy: Final copy, pricing, barcodes, nutritional information, legal disclaimers.
- Manufacturer Information: Correct printer, codes, and contact details if required.
This check should be performed by someone with deep production knowledge, ideally not the person who created the files.
5. Printer Collaboration: The Final Word
Your printer is your partner. They have the most experience with the specific machinery and materials. Engage them early and often.
Share your proofs and final files with them for a pre-flight check. They can often spot issues that might slip through internal reviews, especially related to ink trapping, trapping rules, or specific press limitations.
Don't treat the printer as just a vendor. Treat them as a technical consultant.
Pre-flight Checks
Most commercial printers offer pre-flight services. Use them. They will run your files through specialized software to identify potential problems.
Ask your printer:
- What file format do you prefer?
- What are your specifications for bleeds, trims, and color?
- Do you have specific requirements for spot colors or finishes?
- Can you perform a pre-flight check on our artwork?
Their feedback is invaluable and can save you from costly reprints.
6. Where Revue Fits In
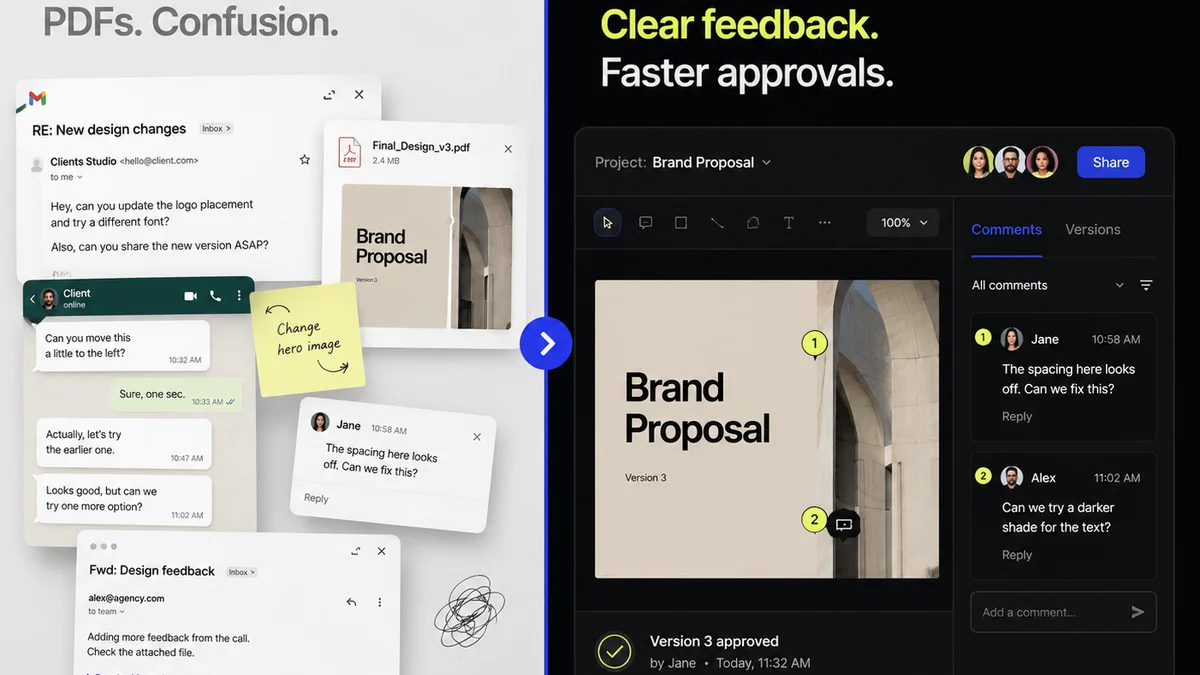
Managing the sheer volume of feedback, revisions, and approvals across multiple stakeholders for packaging projects can be chaotic. This is where a tool like Revue becomes essential for streamlining your packaging QA process.
Revue provides a centralized hub for all creative assets and client communications related to a packaging project. Instead of juggling emails, spreadsheets, and scattered feedback, you have one source of truth.
Centralized Feedback and Revisions
During the design and review phases, feedback can come from internal teams, clients, legal departments, and even marketing. Revue allows you to:
- Consolidate all comments and annotations directly on the artwork files.
- Track the history of revisions and approvals, ensuring nothing is missed.
- Assign tasks and set deadlines for feedback and revisions, keeping the project on schedule.
- Ensure that technical specifications and print requirements are clearly communicated and referenced within the project.
Visibility and Accountability
With Revue, you gain clear visibility into the status of each review cycle and revision. This means:
- Everyone knows who is responsible for what and when it's due.
- It’s easy to see if feedback aligns with the original brief or if new requirements are being introduced late in the process.
- Approvals are captured digitally, creating an auditable trail that protects against disputes.
This structured approach to feedback and approval is a critical component of quality assurance, preventing misinterpretations and ensuring that the final files meet all necessary criteria before hitting the print-ready stage.
7. Final Thought
Packaging is the first physical touchpoint a consumer has with a product. It’s the silent salesperson on the shelf. A mistake isn't just a design flaw; it’s a direct hit to brand perception, consumer trust, and your bottom line.
Are you building quality into your packaging process from the start, or are you just hoping to catch errors at the end?
Frequently asked questions
What is the most common mistake in packaging QA?
The most common mistake is treating QA as a final inspection rather than an integrated process. This means errors aren't caught until they are expensive to fix, or worse, after the product has shipped.
How early should packaging QA begin?
Packaging QA should begin with the project brief. Ensuring all technical specifications, regulatory requirements, and structural details are clearly defined from the outset is the first step in quality assurance.
Who should be involved in packaging QA?
A comprehensive packaging QA process involves designers, project managers, print production specialists, and the client at various stages. Collaboration with the printer for pre-flight checks is also critical.
What is a die-line and why is it important for QA?
A die-line is the blueprint for the package's structure, indicating cut, fold, and glue lines. Its accuracy is paramount for QA, as any deviation can lead to structural issues and printing problems.
How can a tool like Revue help with packaging QA?
Revue centralizes feedback, revisions, and approvals for packaging projects. This provides a single source of truth, improves visibility, ensures accountability, and creates an auditable trail, all of which are vital for a robust QA process.